Christmas
This article may contain affiliate / compensated links. For full information, please see our disclaimer here.
Page Contents
Painted Log Rounds – A DIY Christmas Gift
Difficultly Level: 3/5 (Depending on degree of decoration.)
Areas of Learning Development: Fine Motor, Creative Expression, Social & Emotional Wellbeing, Reading (if you use the small wooden letters)

Let’s Get Festive!
Spending quality time with your child making DIY Christmas gifts for their teacher(s) is a great way to start the season. Stick on a family friendly Christmas CD (I can highly recommend The Star) and enjoy creating together. To make the experience as smooth as possible I would suggest that you get everything set out before your child gets started. You could also have a go at completing one yourself the night before to iron out any difficulties you come across.


Why I Love this DIY Christmas Gift
I loved this craft! DIY Christmas gifts are always high on my agenda. Christmas can become so expensive especially when buying for colleagues and teachers.
It was really lovely to spend a few afternoons with the kids doing an activity that we all enjoyed. My youngest child (just 4) was able to make her teacher’s gifts independently. Both of my children were really proud of their creations. I even spent two evenings (without the kids) getting creative with my own ornament designs! A Christmas craft for all ages.
Have fun making this DIY Christmas gift. There are so many great designs you can create on log rounds. Take loads of photos of your child’s DIY Christmas gift and don’t forget to tag me @yourtalkingteacher.
As Picasso rightly stated,
Every child is an artist
Let’s see what your little artist creates this Christmas.


What You’ll Need:
Click on the images or text below to buy the items you need to complete this DIY Christmas craft. By clicking you will be taken directly to your Amazon account – it’s as simple as that! I’ve done all the hard work for you so that you can concentrate on enjoying getting crafty with your kids.


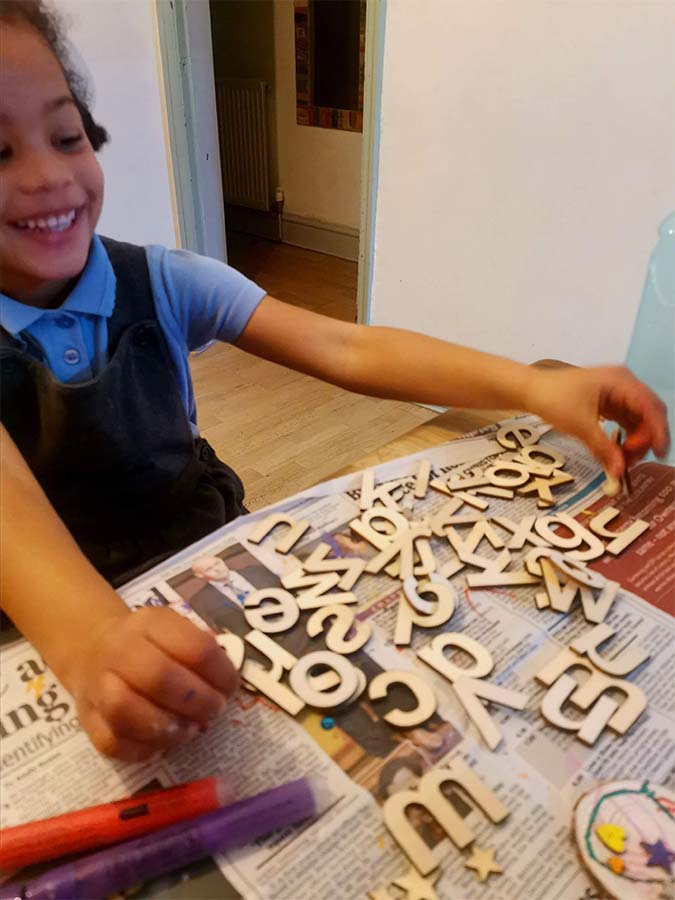
Small Wooden Decorations (I used stars, hearts, love and letters)


Table Covering or Old Newspaper

How To Paint & Decorate Your Log Rounds
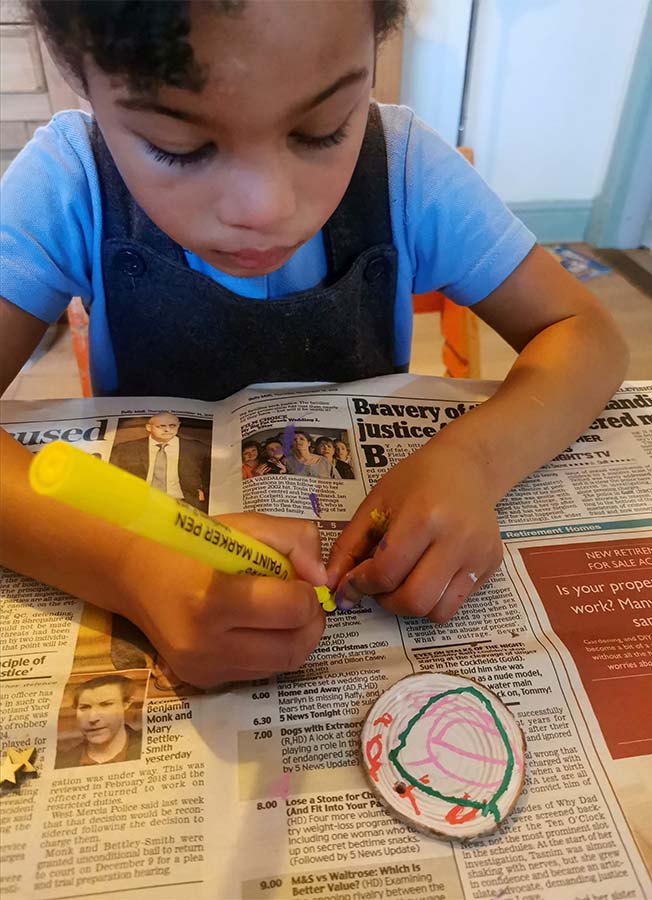
1 – Paint the background of the log rounds & allow to fully dry. (I did this whilst the kids were in bed so they could get on with the making the next day.)
2 – Using the paint pens draw on your designs.
3 – Using the paint pens colour in the small wooden decorations you want to use.
4 – Using generous amounts of PVA, glue the wooden decorations onto the log rounds.
5 – Add extra decoration with the sequins and/or glitter pens.
6 – Allow to dry.
7 – If desired repeat on the other side of the log rounds.
8 – Cut lengths of approximately 15cm from the natural string (included in the pack of log rounds).
9 – Fold the strings in half and tie knots at each end.
10 – Thread through the holes in the log rounds and secure them in place.
11 – Hang your decorations proudly on your tree or package them up ready to give away.
12 – Don’t forget to take a photo and tag @yourtalkingteacher! I just love seeing your creations, it honestly brings joy to my soul.

DIY Christmas Gift Helpful Tips:
The Artistro paint pens are great but they are acrylic. You will need to cover your table with something protective like old newspaper. Unless you don’t mind your kids getting their clothes stained they will have to wear an apron.
Show your child/ren where the top of the decoration is (the small drilled hole). Explain that this hole needs to at the top when they start their decorating. (We have a few decorations that hang upside down because I forgot to tell mine this at the beginning!)
My kids made decorations for their teachers using the first letters of their surnames. My daughter (who just started school in September) really enjoyed saying the names of her teachers and identifying the initial (first) sound of each one. She then had to find the corresponding wooden letter.
Allow your child to use their imaginations, don’t come to the table with preconceived ideas as to what the decorations should look like. My son surprised me when he poured the pot of sequins over his PVA covered log. I was a bit taken a back, but, when he had finished, the decoration looked fabulous. I never would have thought of doing that!
Enjoy the activity yourself. Sit down with the kids with a cuppa and try and have fun decorating alongside them. Your ideas will spark ideas for them and vice versa.


